Enable IP restriction to secure login to my Site24x7 account
You can control access to your Site24x7 account by configuring trusted IP addresses and allowing login only from those IP addresses.
Please follow the below steps to configure/manage your trusted IP addresses for a single user:
- Log in to your Site24x7 account.
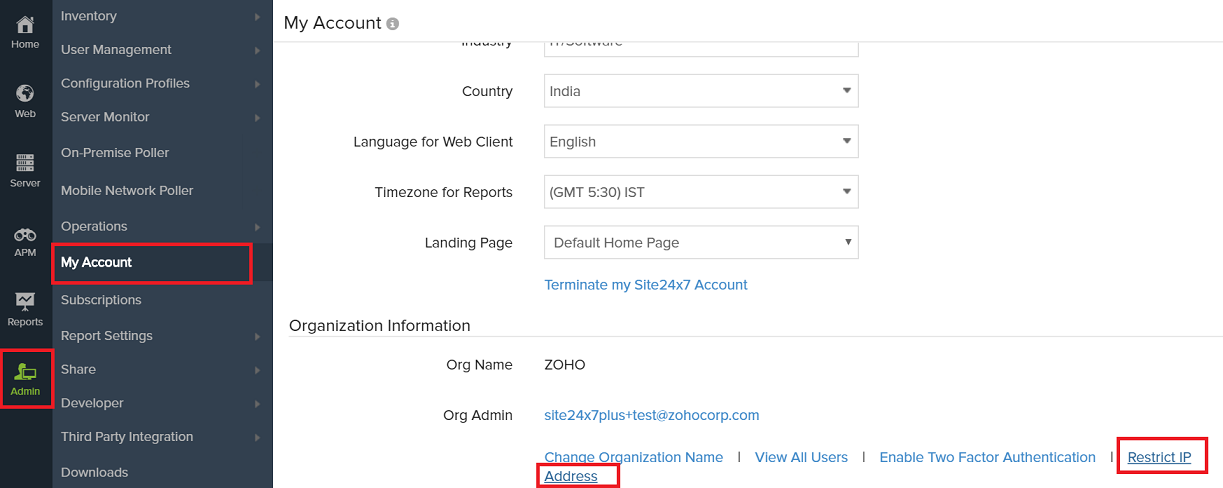
- Select My Account from the user profile at the top right.
- Click Restrict IP Address and this will direct you to accounts.zoho.com.
- Go to Security > Allowed IP Address > Add Allowed IP Address.
- Select the desired IP address format and click Next.
- On the pop-up that appears, click Add IP Address.
At the organization level,
- Log in to your Site24x7 account.
- Select My Account from the user profile at the top right.
- Click Restrict IP Address under Organization Information

- This will direct you to directory.zoho.com. Go to Admin Panel > Security. In the Security tab choose your preferred policy and select Allowed IP.
- Configure the IP addresses, from which you would like to allow access to your Site24x7 account
-
Also, specify the user role to which you want to restrict that IP address
Choose Allowed IPs
- Click Add to update the information
After you configure the IP addresses, login to your Site24x7 account can be made only from these IP addresses that you trust.
Related Articles
Define IP address conditions in AWS IAM policies for enhanced security.
Site24x7 makes programmatic calls to your AWS account using access keys (Secret Access Key and Access Key ID) or RoleARN to gather metrics of supported AWS resources, mentioned in the IAM policy document. For extra security, the user can define ...Secure my Site24x7 account using Two Factor Authentication
The Two-Factor Authentication (TFA) is a two-step verification process before you are authorized to log in to your Site24x7 account. It provides an additional layer of security to your Site24x7 login process. At the organization level, Log in to your ...IP and port that requires firewall exclusion for the APM Insight agent communication
All APM Insight agents communicate to plusinsight.site24x7.com server through HTTPS port 443. All communication from the agents is one way, i.e., there will only be outgoing requests to the above-mentioned server. The list of IP's to be whitelisted ...Converting Site24x7 Evaluation account into MSP Edition
MSP Edition lets you manage your customers' IT stack efficiently with our secure, scalable, and affordable monitoring suite for MSPs and CSPs. White label your monitoring platform and reports with a custom name, logo, and URL so that you can promote ...Login using my current username and password with Site24x7
Your existing password might not work after we migrate your account to Zoho Single Sign-On. After the migration, one of the below changes will happen: If you do not have an account with Zoho already (with the same email id as that in Site24x7), you ...